

- Send bulk messages from supported SA5 reports using Send to Texting
- Create SA5 texting templates using customer data fields
- Track unsuccessful messages through the SA5 Call Log
- Manage customer texting preferences and opt-outs
- Use the Captivated Chrome extension to send individual messages and view conversation history from a customer’s SA5 record
Step 1: Connect Captivated to SA5
You’ll need the API key provided in your Launch Plan.Add Your Captivated API Key
- Copy your Captivated API key.
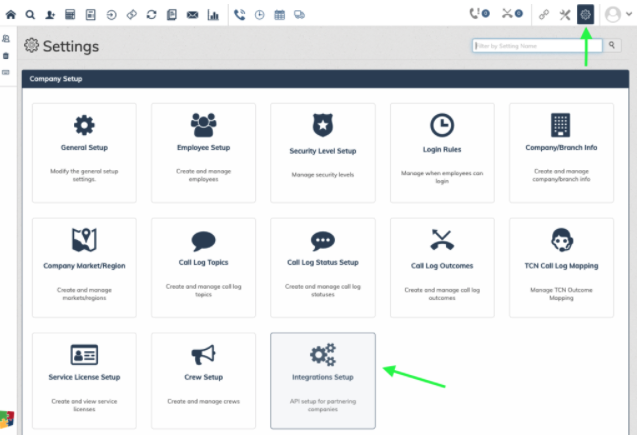
- In SA5, select the gear icon.
- Select Integrations Setup.
 Expand Texting Provider.
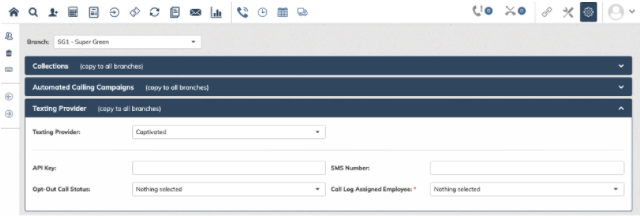
Access to Integrations must be enabled within Employee Security to make changes. Settings can be configured for an individual branch or copied to other branches the User has access to using Copy to All Branches
- Paste your Captivated API key into the API Key field.
- Enter the Captivated number customers should receive messages from in the SMS Number field.
Important: Enter the 10-digit SMS number using numbers only. Do not include spaces, periods, dashes, or parentheses.
Example: 1112223333
Configure Call Logs for Unsuccessful Messages
You’ll also configure how SA5 handles messages that are unsuccessful. Opt-Out Call Status:Choose the Call Log status that should be used when a message is unsuccessful. Call Log Assigned Employee:
Choose the employee who should receive Call Log entries for unsuccessful messages. Common reasons a message may be unsuccessful include:
- The customer has opted out
- An invalid or incorrect phone number
- The selected template isn’t assigned to the customer’s branch
- An API key isn’t available
Step 2: Create Texting Templates in SA5
Before using Send to Texting from an SA5 report, you’ll need to create your texting templates within SA5.Texting templates created in SA5 are completely separate from Templates created within Captivated
Create a Texting Template
- Select the gear icon.
- Select Document Template Setup.
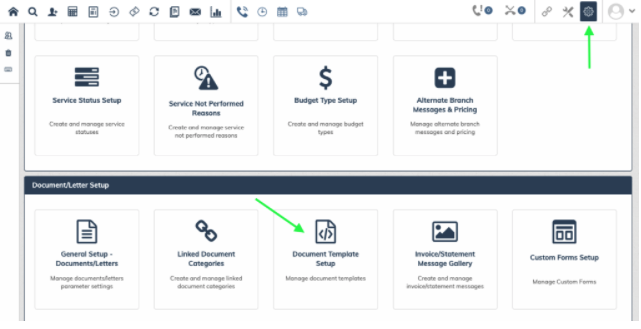
You can check or uncheck Show System Templates to control which existing templates are displayed.

- Select the + icon to create a new template.
- Enter a name for your template.
- Under Template Type, select Texting.
- Compose your message.
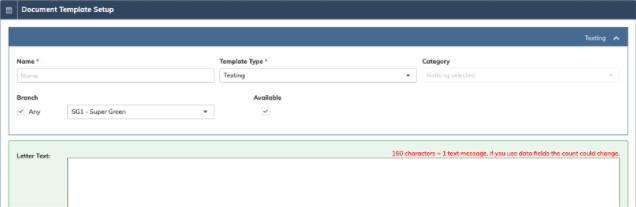
Add Data Fields
SA5 data fields allow you to personalize the message using information from the customer’s record.- Select the three-bullet list.
- Find the data field you want to use.
- Drag and drop it into the Letter Text field.

Step 3: Send Bulk Messages From SA5
The Send to Texting option allows you to send messages from supported SA5 reports through Captivated. Depending on your SA5 setup, this may be available from reports such as:- Unpaid Invoices
- Unserviced List
- Credit Hold
- Route Loose Work
- Customer List
- Invoice Printing
- Aging Report
- Additional reports that include Send to Texting under Actions
Once a bulk message has been sent, it cannot be unsent. Carefully review the customers included in your report and your message template before sending.
How Phone Numbers Are Selected
Messages are only sent to customers who have a text or cell phone number on their customer record. If the customer has both, only one message is sent, with the text number taking priority.Send a Message From a Report
- Select the Reports icon.
- Open the appropriate report.
- Configure and run the report as you normally would.
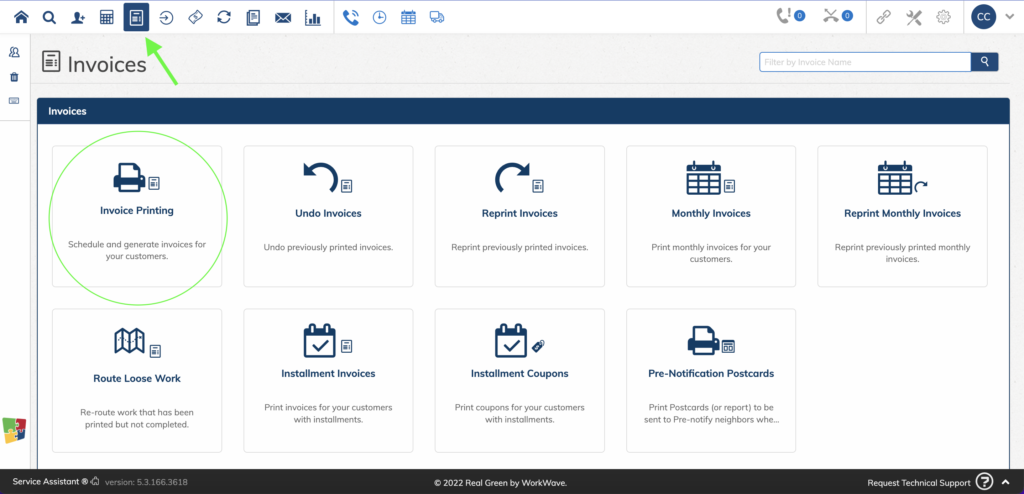
- Select the Actions button.
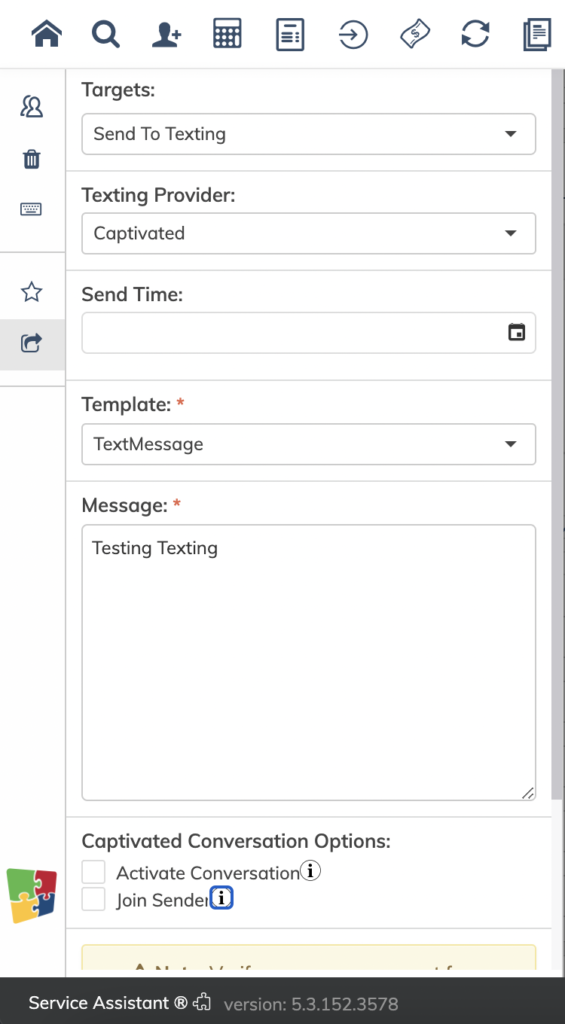
- Under Targets, select Send to Texting.

- Select the texting template you want to use.
- Review your send options.
- Review the Captivated Conversation Options.
- Send your messages.
 Be Careful With the Send to Texting Shortcut
Selecting Send to Texting next to the Preview button at the bottom of the report automatically sends the most recently used template.Always confirm your report and intended recipients before using this option.
Sending Text Aheads From Invoice Printing
One common use of the integration is sending Text Aheads from Invoice Printing.- Add the appropriate customers to your search.
- Select Go to Map to route them, or select Next to view the list.
- Before generating or printing invoices, select Actions from the left-hand menu.
- Under Targets, select Send to Texting.
- Select your template.
- Review your send options and Captivated Conversation Options.
- Send your messages.
What Happens After Sending?
After sending, SA5 displays a pop-up showing the number of:- Successful sends
- Unsuccessful sends
- Customer opted out
- Invalid phone number
- Template isn’t assigned to the customer’s branch
- API key isn’t available
An unsuccessful message means the message did not come into Captivated.
Review Sent Messages in Captivated
To find and review these conversations in Captivated, change your conversation filters from: Mine → Everyone and Active → AllManaging Customer Opt-Outs
It’s important to account for customers who should not receive text messages when building your SA5 reports.Exclude Customers Who Have Opted Out
When configuring your report:- Select the + next to Advanced Options.
- Expand Preferences.
- Choose Allowed.

- If a customer replies STOP, the Don’t Text checkbox is automatically selected on their SA5 customer record under: Contact → Preferences This prevents messages from being sent to that customer through an SA5 report.
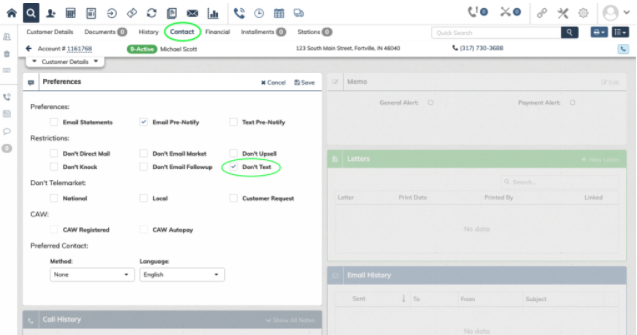 SA5 Don’t Text vs. Captivated Opt-Outs
The Don’t Text preference within SA5 and an opt-out within Captivated do not work exactly the same way
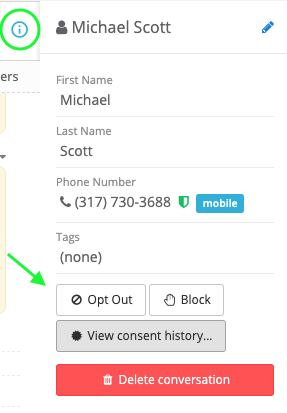
- Open the customer in Captivated.
- Select the information icon.
- Choose Opt Out.
AMA Before Service Texts
Texting through the Captivated integration is independent of AMA Before Service Texts. Within SA5:- The SMS Number on the Company Setup parameter page is labeled AMA SMS Number.
- AMA texting preferences operate separately from Captivated’s texting integration.
- The Don’t Text contact preference used for Captivated does not impact AMA.
Step 4: Send Individual Messages Using the Captivated Chrome Extension
In addition to bulk messaging from SA5 reports, you can use the Captivated Chrome extension to send an individual customer a message and access their Captivated conversation history without leaving their Customer Details page. First, install the Captivated Chrome extension.Send an Individual Message
- Sign in to your Captivated account.
- Open the customer’s Customer Details page in SA5.
- Open the Captivated Chrome extension.
- Select the green New Message button next to the customer’s name.
 Choose the Captivated Channel you want to send the message from.
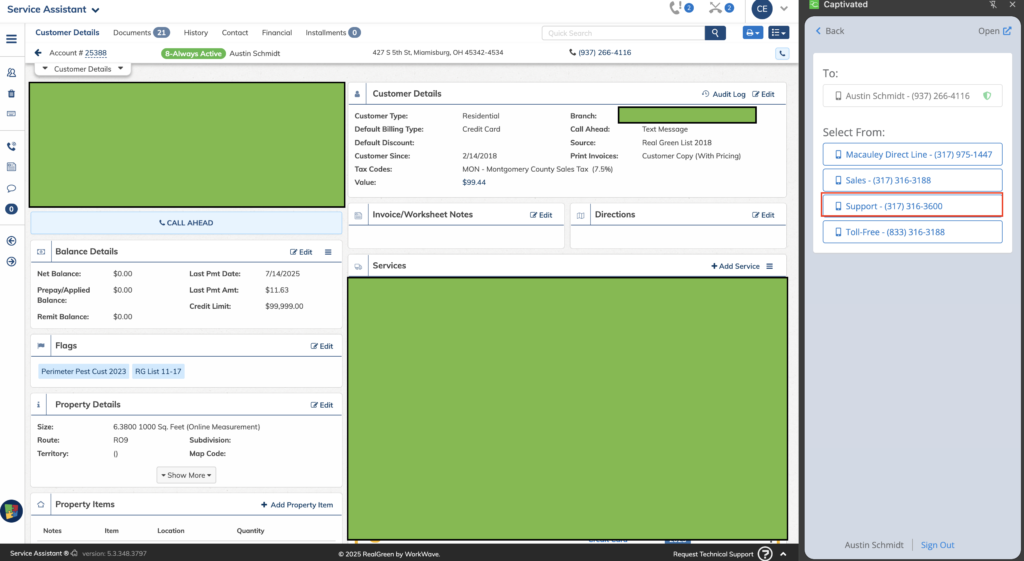
- Compose your message.
- Select Send.
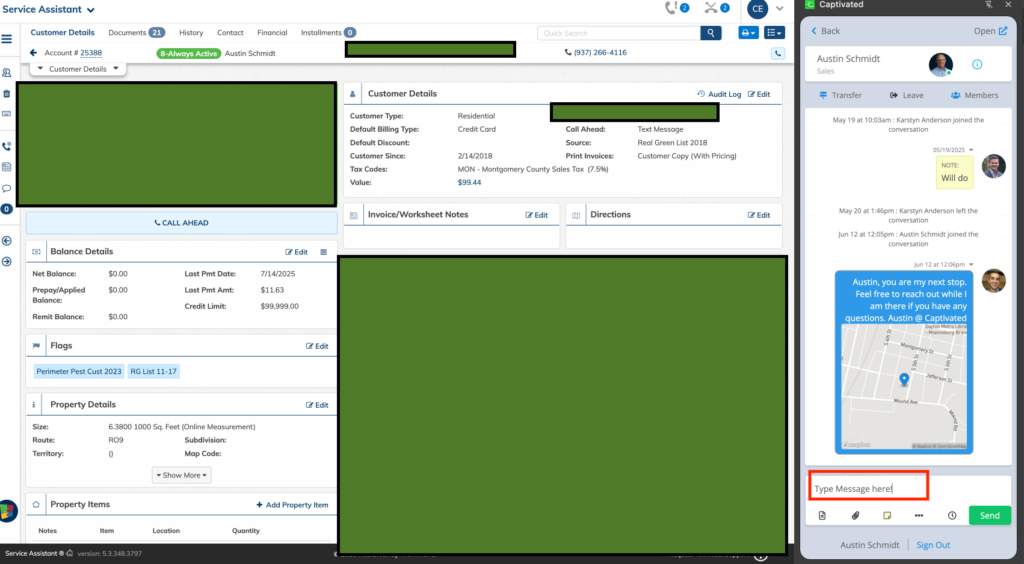 The Captivated Chrome extension checks the phone numbers associated with the customer’s SA5 account and matches them with previously texted numbers when available.
If the customer has opted out within Captivated, they cannot be messaged again on that Channel until they send your business a new inbound message.
The Captivated Chrome extension checks the phone numbers associated with the customer’s SA5 account and matches them with previously texted numbers when available.
If the customer has opted out within Captivated, they cannot be messaged again on that Channel until they send your business a new inbound message.
View Conversation History
Select the contact card next to the text bubbles within the extension to view the customer’s previous Captivated conversation history.Troubleshooting
Why didn't my message send?
Why didn't my message send?
Check the SA5 Call Log. Common reasons for an unsuccessful message include:
- The customer has opted out
- The customer’s phone number is invalid
- The template isn’t assigned to the customer’s branch
- An API key isn’t available
Why don't I see Integrations Setup?
Why don't I see Integrations Setup?
Integration access must be enabled within Employee Security.
Why can't I find my SA5 template in Captivated?
Why can't I find my SA5 template in Captivated?
SA5 texting templates and Captivated Templates are separate. Templates created within SA5 are used with the SA5 Send to Texting functionality.
Where can I find messages sent from SA5 in Captivated?
Where can I find messages sent from SA5 in Captivated?
Change your Captivated conversation filters to Everyone and All to locate conversations beyond those currently assigned to you.
Why are messages appearing as new queued conversations?
Why are messages appearing as new queued conversations?
Review the Captivated Conversation Options when sending from SA5. For the recommended experience, leave both options unchecked.
I selected Don't Text in SA5. Why can the customer still be texted from the Chrome extension?
I selected Don't Text in SA5. Why can the customer still be texted from the Chrome extension?
The SA5 Don’t Text preference does not prevent a User from messaging the customer through the Captivated Chrome extension. The customer must also be opted out within Captivated.
Can I unsend a bulk message?
Can I unsend a bulk message?
No. Once a bulk message has been sent, it cannot be unsent. Always review your recipients, template, and send options before sending.