Step by Step Video Walkthrough
 During onboarding, Captivated can import your customer list for you. You can also import the file yourself once it has been exported.
Export Your Customer List
- In Service Assistant, go to Reports.
- Select the Customer List report.
- Choose the appropriate report filters for your organization.
- Selecting customers with an Active status (8 and 9)
- Selecting a future Service Year
- Checking Include Customers Without Services
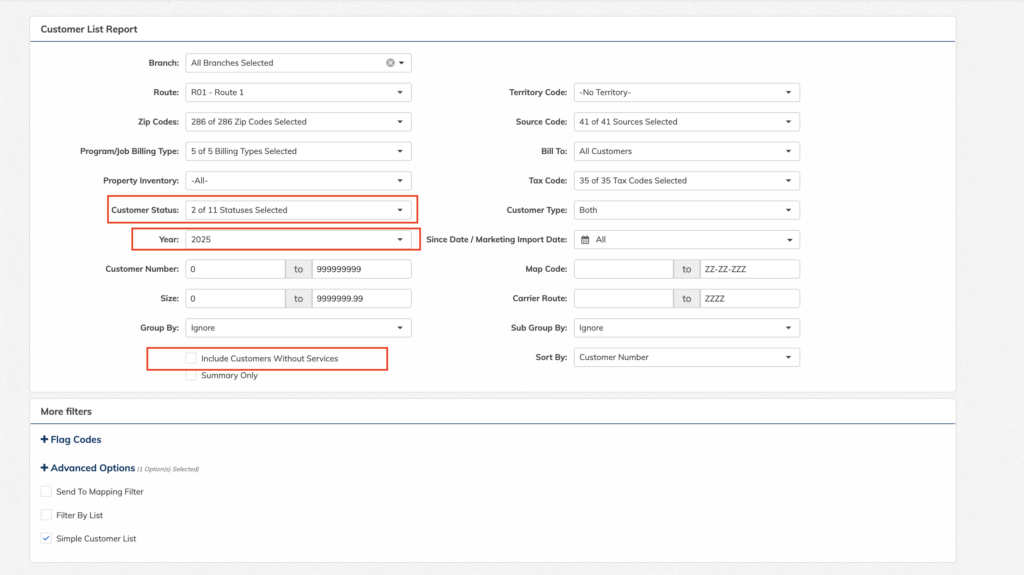
Why select “Include Customers Without Services”?
This helps prevent duplicate rows from being created for the same customer, making the file easier to clean up and import into Captivated.
This helps prevent duplicate rows from being created for the same customer, making the file easier to clean up and import into Captivated.
Preview the Export
Once your report parameters are set:- Select Preview in the bottom-right corner.
- Review the results to make sure the customer list looks correct.
Export to CSV
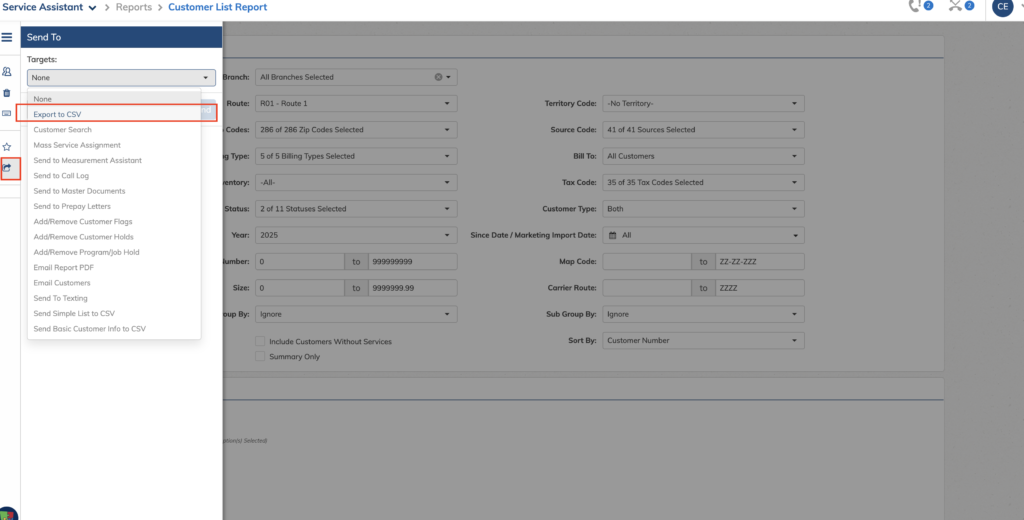
After reviewing the list:- Select the Send to Actions button on the left side of the screen — the box with an arrow.
- Choose Export to CSV.
For Captivated imports, we typically do not use the Preferred Phone Number field because that number is generally duplicated in one of the other phone-number columns in the export.